Recover Word Files after Upgradation of Word 2013 To 2016
Most of the people are wondering how to get the latest version of MS Office after the release of MS Office 2016. If you have purchased MS Office 2013 or an existing subscription of Office 365 then to upgrade MS Office 2013 to 2016 or to know how to upgrade Word 2013 to 2016, you need to go to Microsoft Official website, and sign in with your Microsoft account.
Once you signed in the Microsoft account, you need to click the area under “Install” where it says “New”: Office 2016 is now available.”
- Next click on “Install” option.
- Now click on the setup executable, either from the downloads folder or from the browser.
- User Account Control should pop up a message to ask you to if you want the installer app to make changes to the system.
- Click on “Yes” to continue the process.
Uninstallation of MS Office 2013 and installation of Office 2016 can take some time. When the installation gets over, you will see a welcome video which will explain you how to find the apps and start MS Office 2016.
How to recover Deleted Dcouments
MS Office holds Word, Excel, PowerPoint, Outlook, OneNote, Publisher, Access, etc. During the upgrading process, you might lose data from Word file. In such situation, you need to use recovery software to recover the lost Word file because there is no manual method to recover the lost Word file from the system. So, you can opt Recover Deleted Document software to recover Word 2013 file which get lost during the upgradation of Word 2013 to 2016 with ease. It can extract the text from the Word file. Once Word file is repaired using this software, the extracted text can be saved in a new healthy blank Word file.
How Safe is Recover Deleted Document Software:
Your original .doc or .docx file remains intact: This software reads only from the original file and creates a new healthy Word 2013 file. It guarantees that your original Word file remains unchanged and no further damaged will be caused.
Professional 24* 7 Support: The support team is available 24* to resolve any difficulties and provides you an unlimited number of questions related to product. You can contact our support team 24* 7 through submitting a trouble ticket thorough our website or live chat.
Features of Recover Deleted Document Software:
- Recover DOC and DOCX file.
- Supports recovery of document file on all major versions of Windows OS such as Windows 10, Windows 8, Windows 7, etc.
- Repairs and recover text, OLE objects, formatting, hyperlinks, from the Word file.
- Once the repairing process is over, you can view the recovered Word file prior to restoration.
- Recovers PowerPoint, Excel, OneNote, etc.
Note: Demo version of the software is exactly similar to the licensed version, except saving option of the recovered data is disabled. This tool needs to be activated to enable the saving option which completes the recovery of Word file.
Steps to Recover Lost Word File after upgrading Word 2013 to 2016:
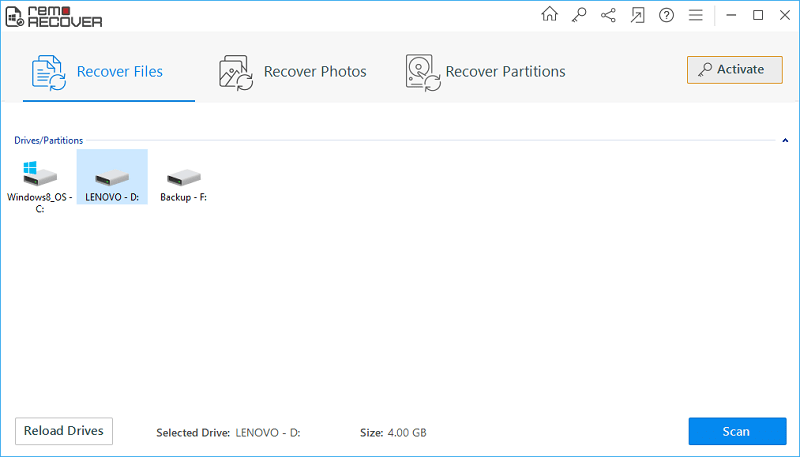
Step 1: Download and Install the free version of Document Recovery Software on your system. Launch the software by double clicking on the desktop icon. Once the software gets launched, click on "Recover Files" option from the main window. Then, a list of logical and physical disks available in the system are displayed. Now, choose the drive from where Word file has to be recovered, and click "Scan" button to start the recovery process.

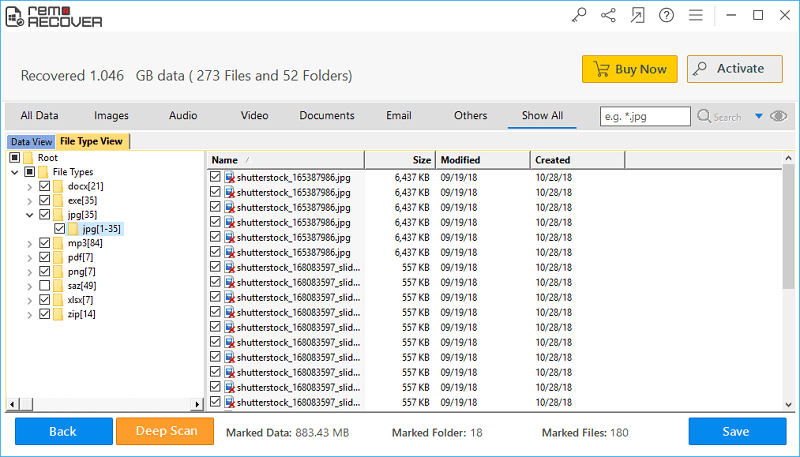
Step 2: Now, the software starts scanning the selected drive to find deleted/lost Word documents. Upon the completion of scanning & recovery process, a list of recovered files are displayed on the screen. You can view the recovered files in "File Type View", and "Data View"

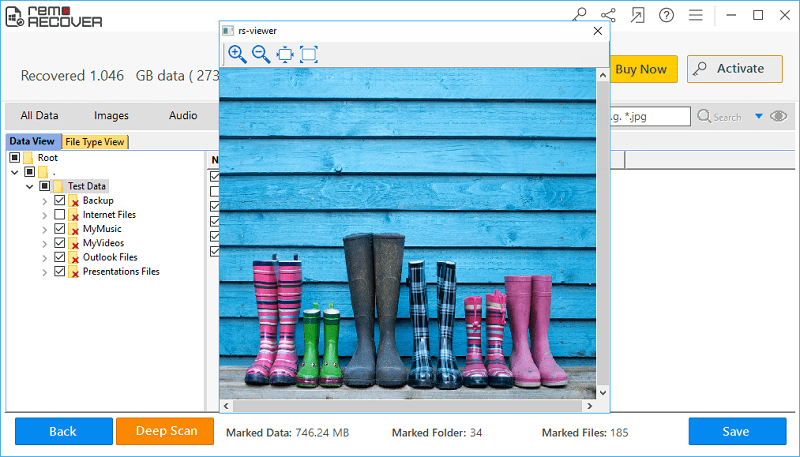
Step 3: Prior saving the recovered files, you can preview the recovered file by double clicking on the respective file or just by right-clicking on the file, and selecting Preview option

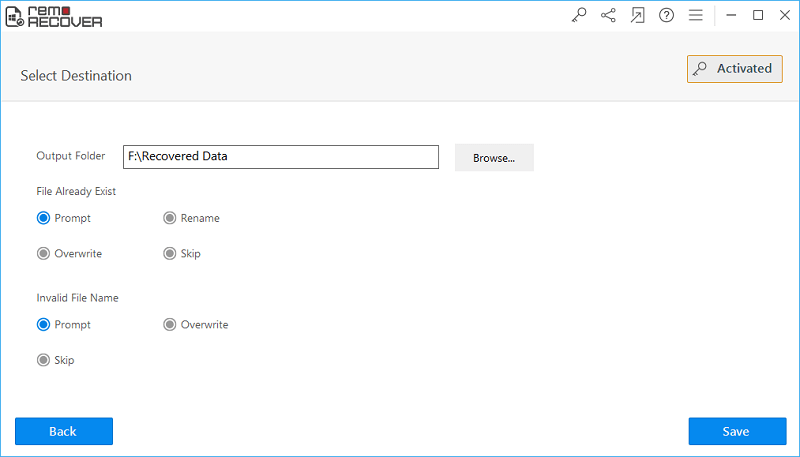
Step 4: At last, if you are satisfied with the tool, and found all your deleted Word files, then activate the license key of the tool, and save the recovered files at the location of your choice.
